Easy Classic French Bean Poles
Easy Classic French Beanpoles
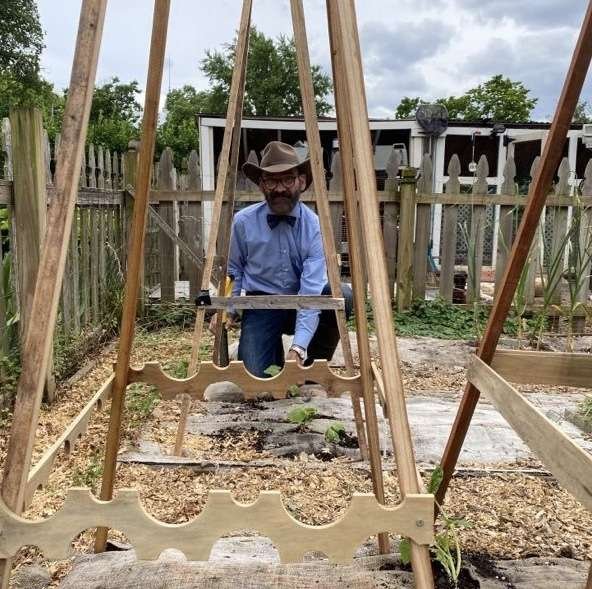
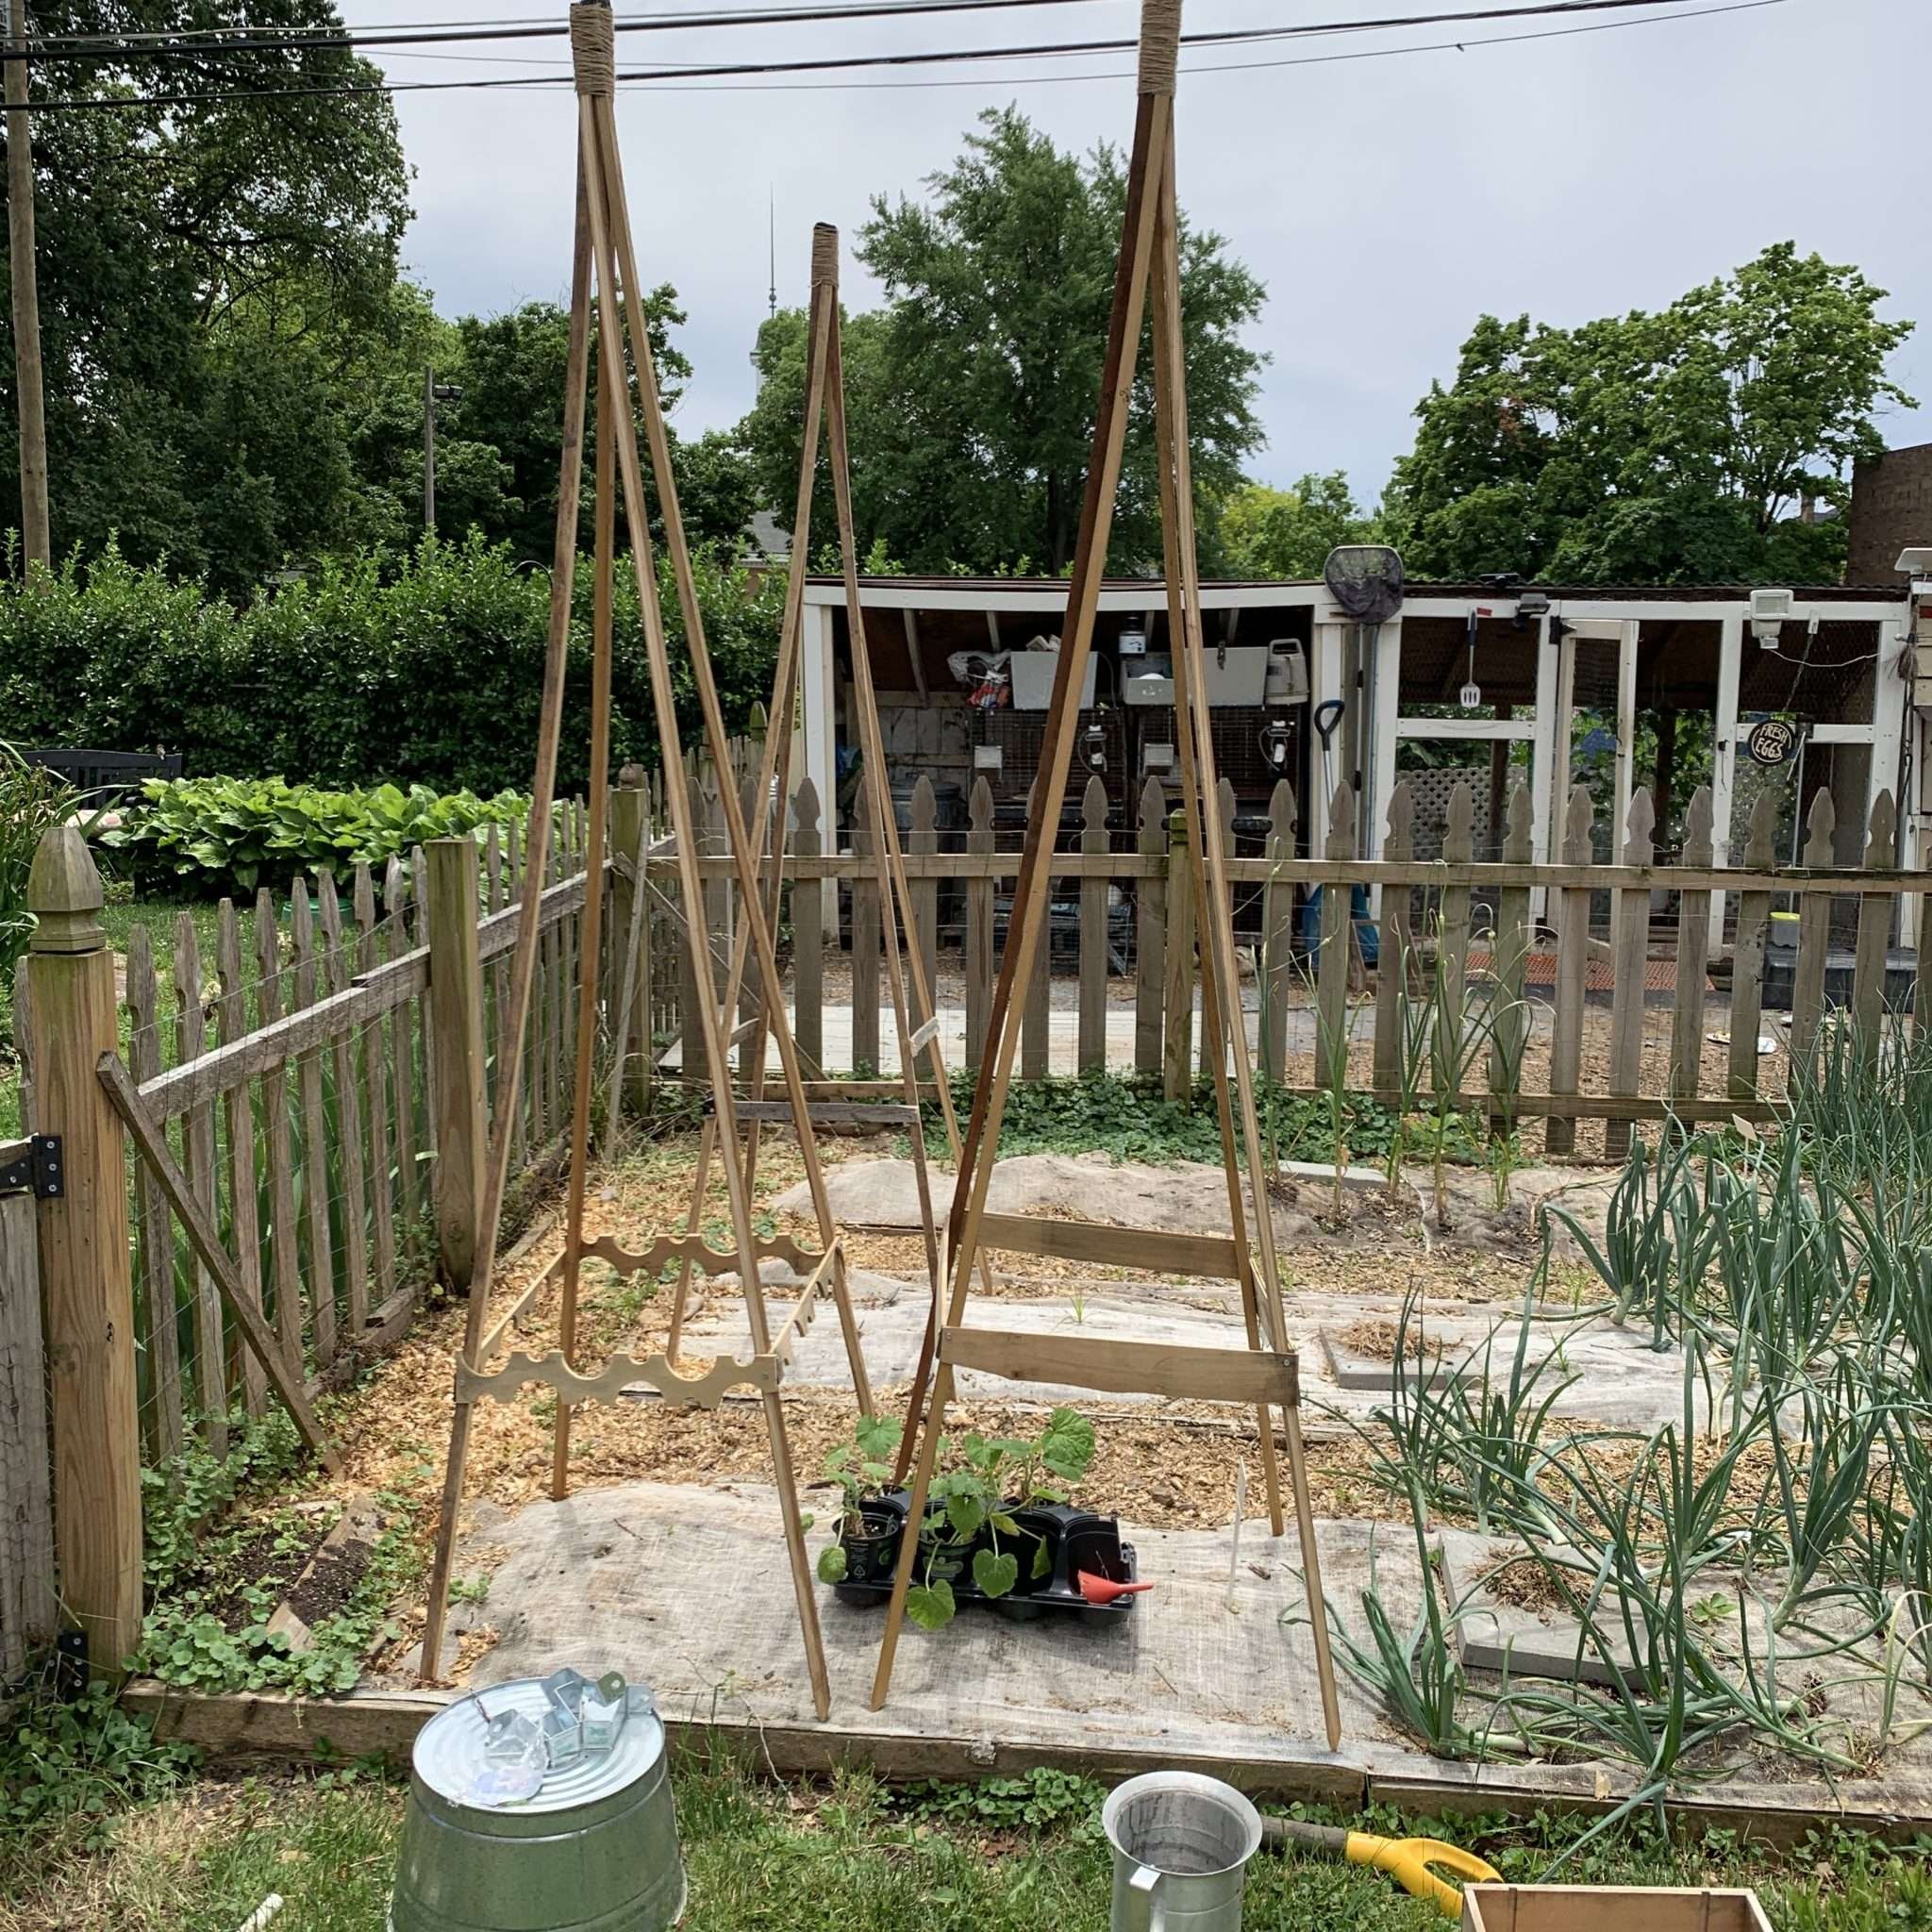
This spring and summer I am trying something new with my easy classic French bean poles at Mezzacello. Previously, I used a more robust and architectural version of this tower - inspired by French Chateau potager gardens. Beans grow well up this leggy tower.
This year, I am playing with using them to grow squashes. Lightweight straight neck and hook necked species. The leaves want to spread all across the garden. This year, they can grow up!
Materials, Choice and Function
I chose to create three of these towers. I planted a squash at two opposing corners. This gives the vine lots of room to spread out into the interior volume of the tower and up the slender graceful poles. I also took the time to position the plants where they grow and spread without interfering with the spread of the others.
I will be monitoring the impact of the third tower on the growth of the towers directly to the north. The two front towers will cast the six-foot wide green lawn walkway in shadow, but not the beds across the walkway. That is one way we use algebra and trigonometry in everyday life, people.
A Visual Gallery

Notes on Construction
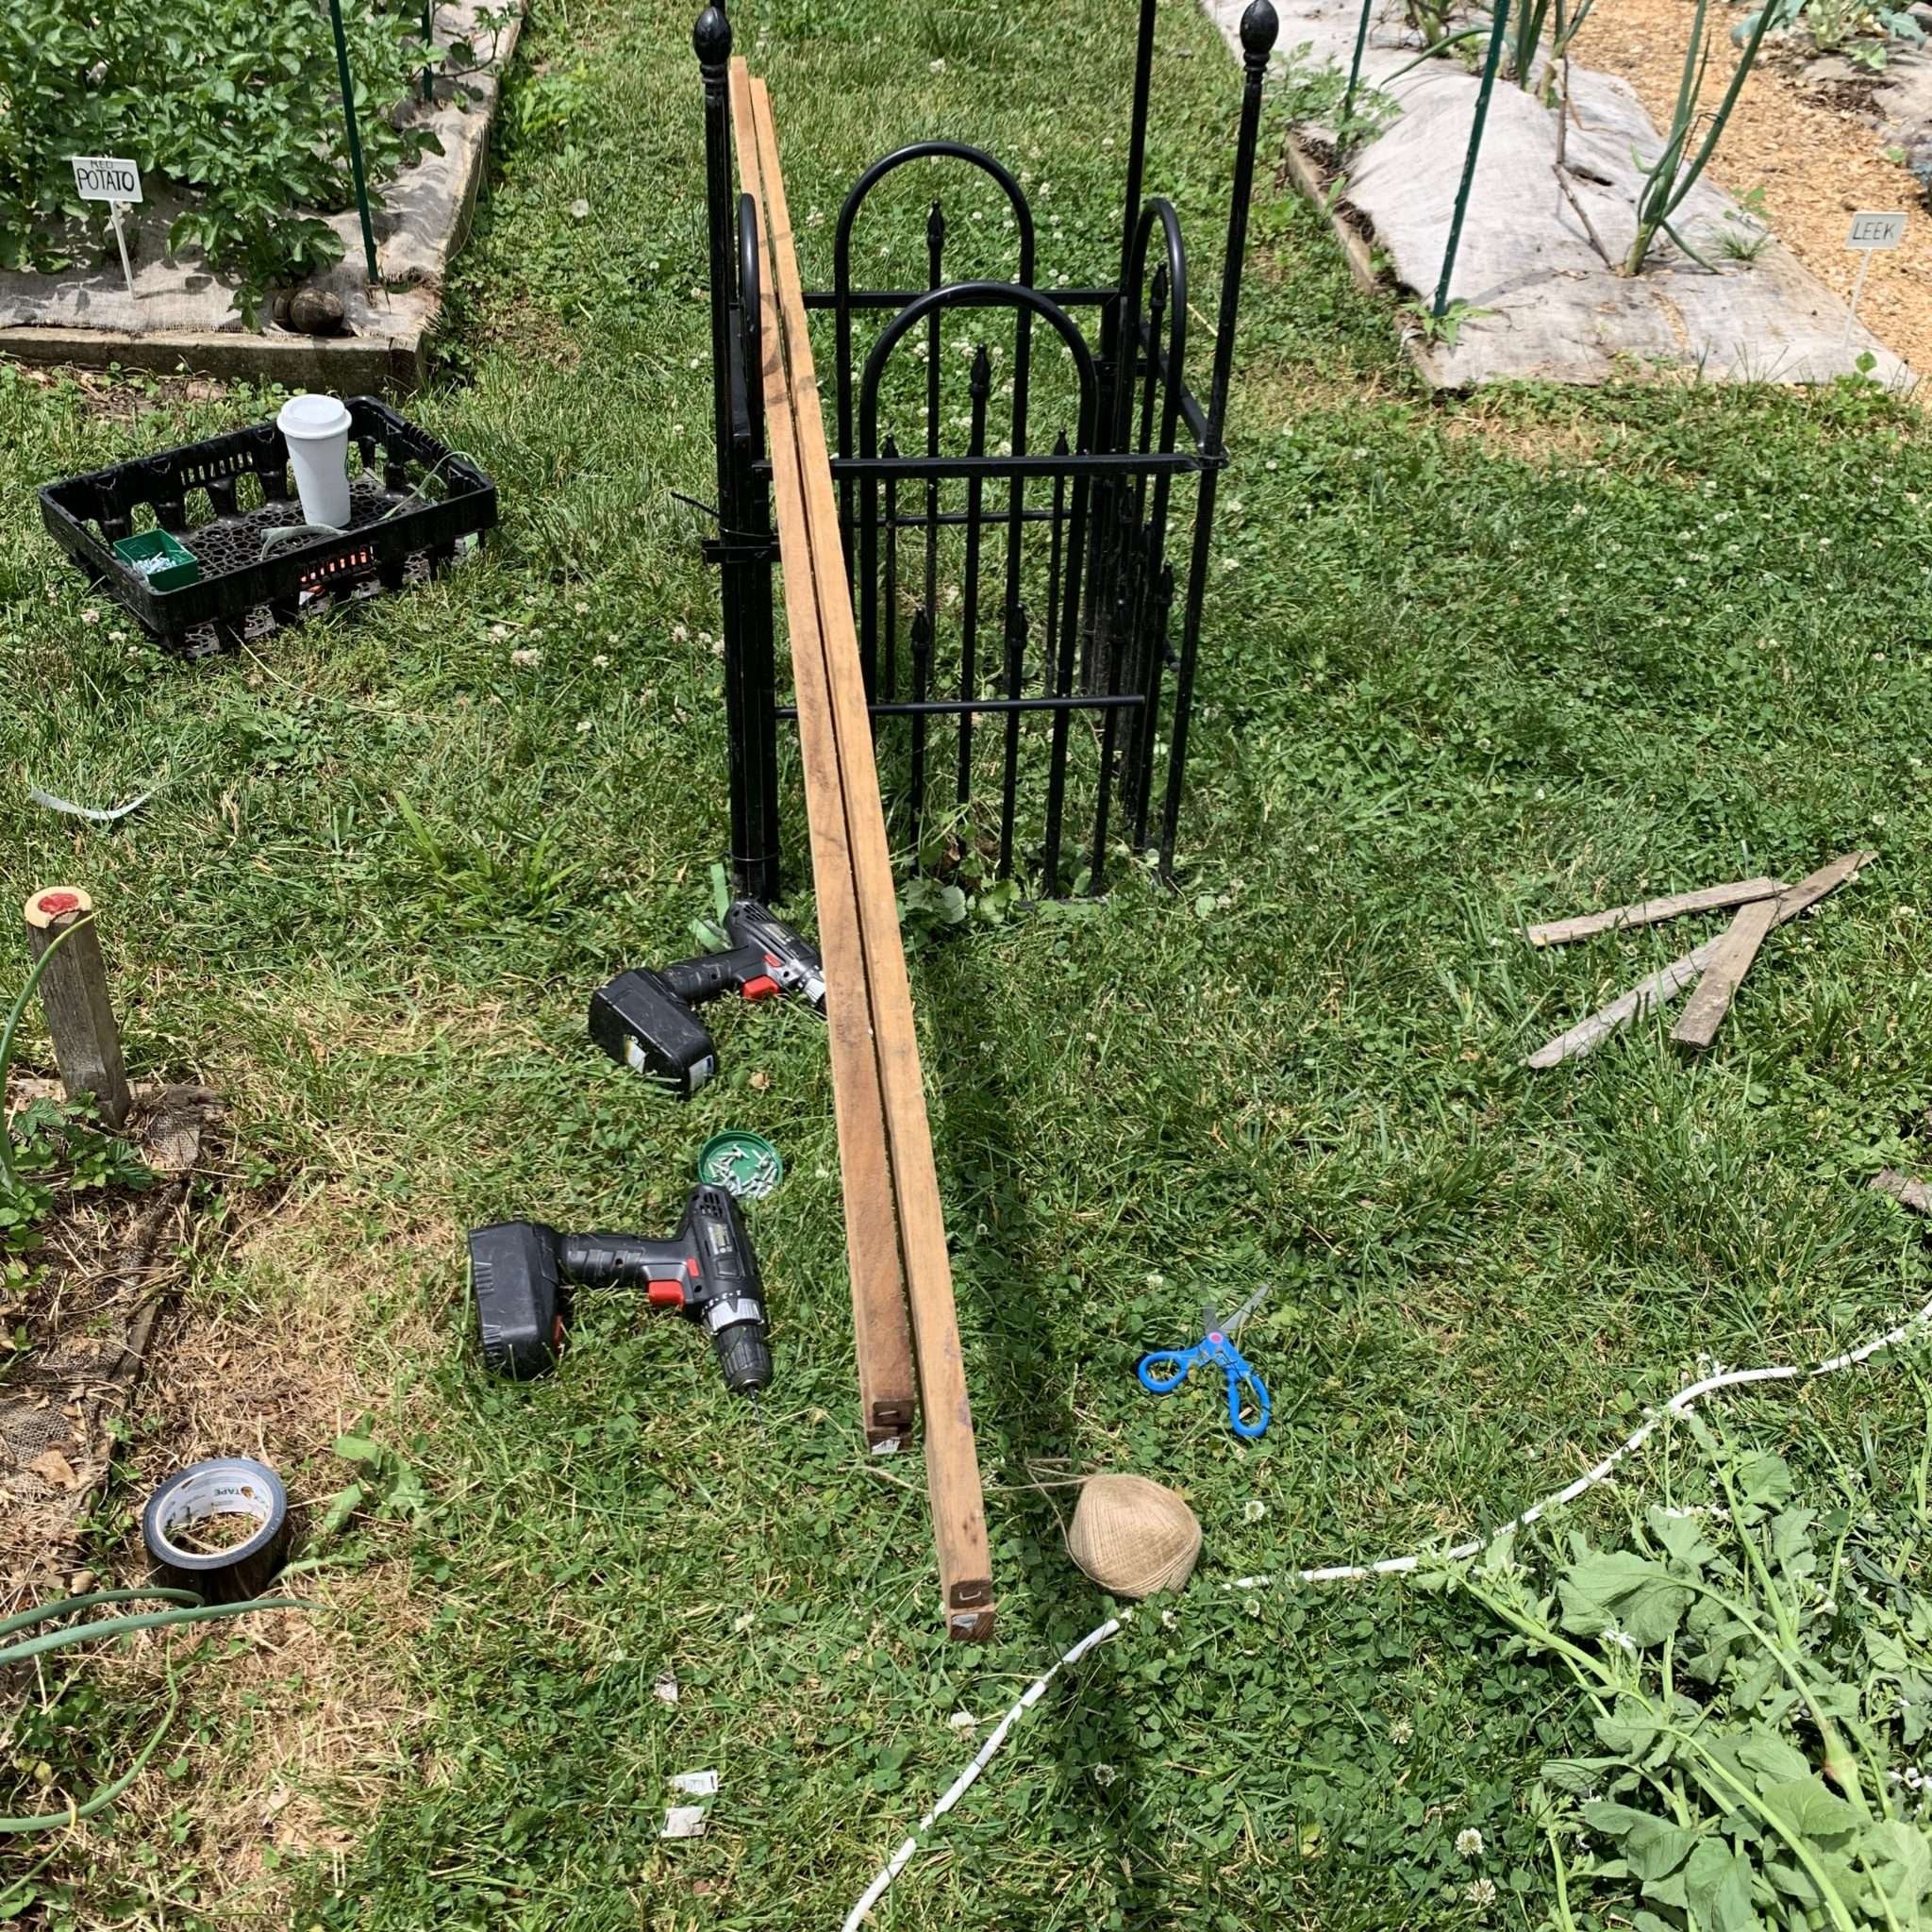
Materials List:
- 4 - 1” x 1” x 8’ cedar stakes
- Scrap wood for fashioning spanners
- small 1” long wood screws
- Duct Tape
- Jute Twine
- Two pieces of 20-24” 1/2” rebar or PVC
Choosing the right materials is important!
Initially I built these towers from pine 1”x2” wood 9’ long. The pine bends well, but it also dries and cracks quickly. You won’t get more than one season from pine. The other mistake I made was using mechanical fasteners on the apex (screws) strong and secure, but they cause the pine to split. So this year I have two innovations on this.
Use 1”x1” x 8’ CEDAR poles. Cedar is rot resistant, crack resistant, dense, and flexible. Yes, they cost more than pine (3 times more — pine 1”x2” x 8’ $2.99, cedar stakes 1”x1” x 8’ $8.99) but the cedar looks better and lasts longer. You could experiment with other options like trex deck wood maybe cut into strips? A next experiment? I literally just thought of that typing this. LOL!
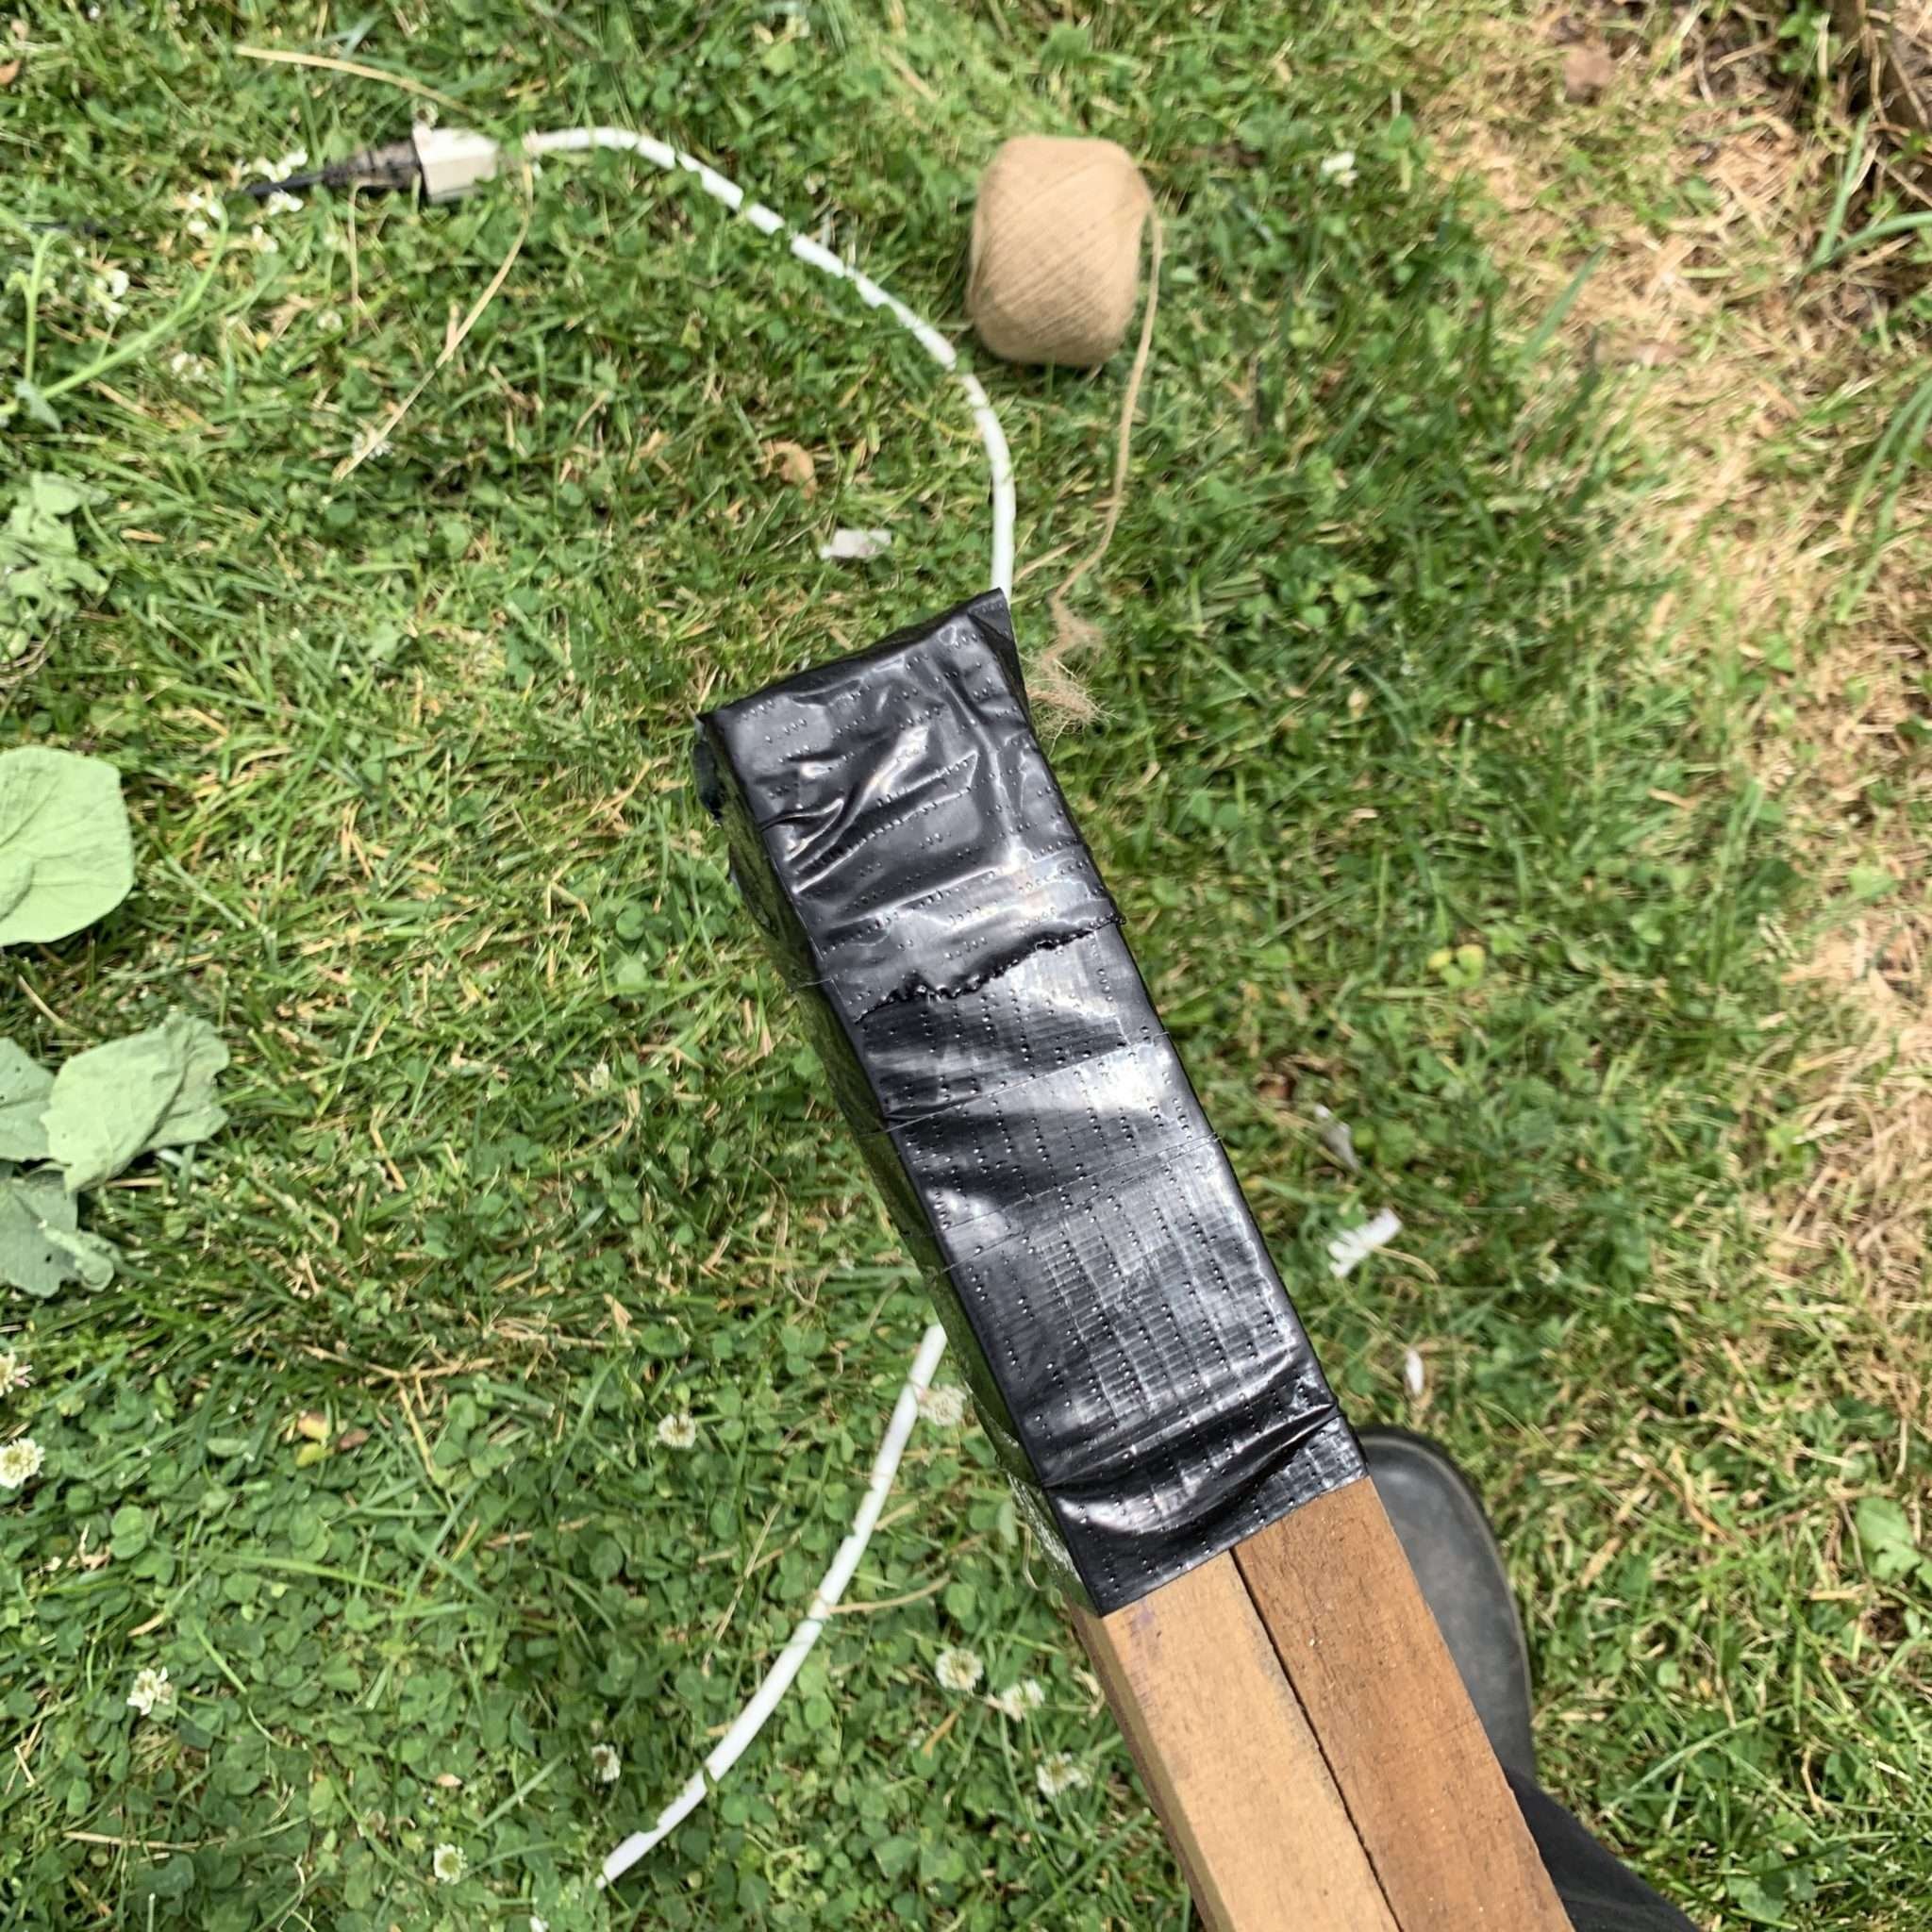
Duct Tape!
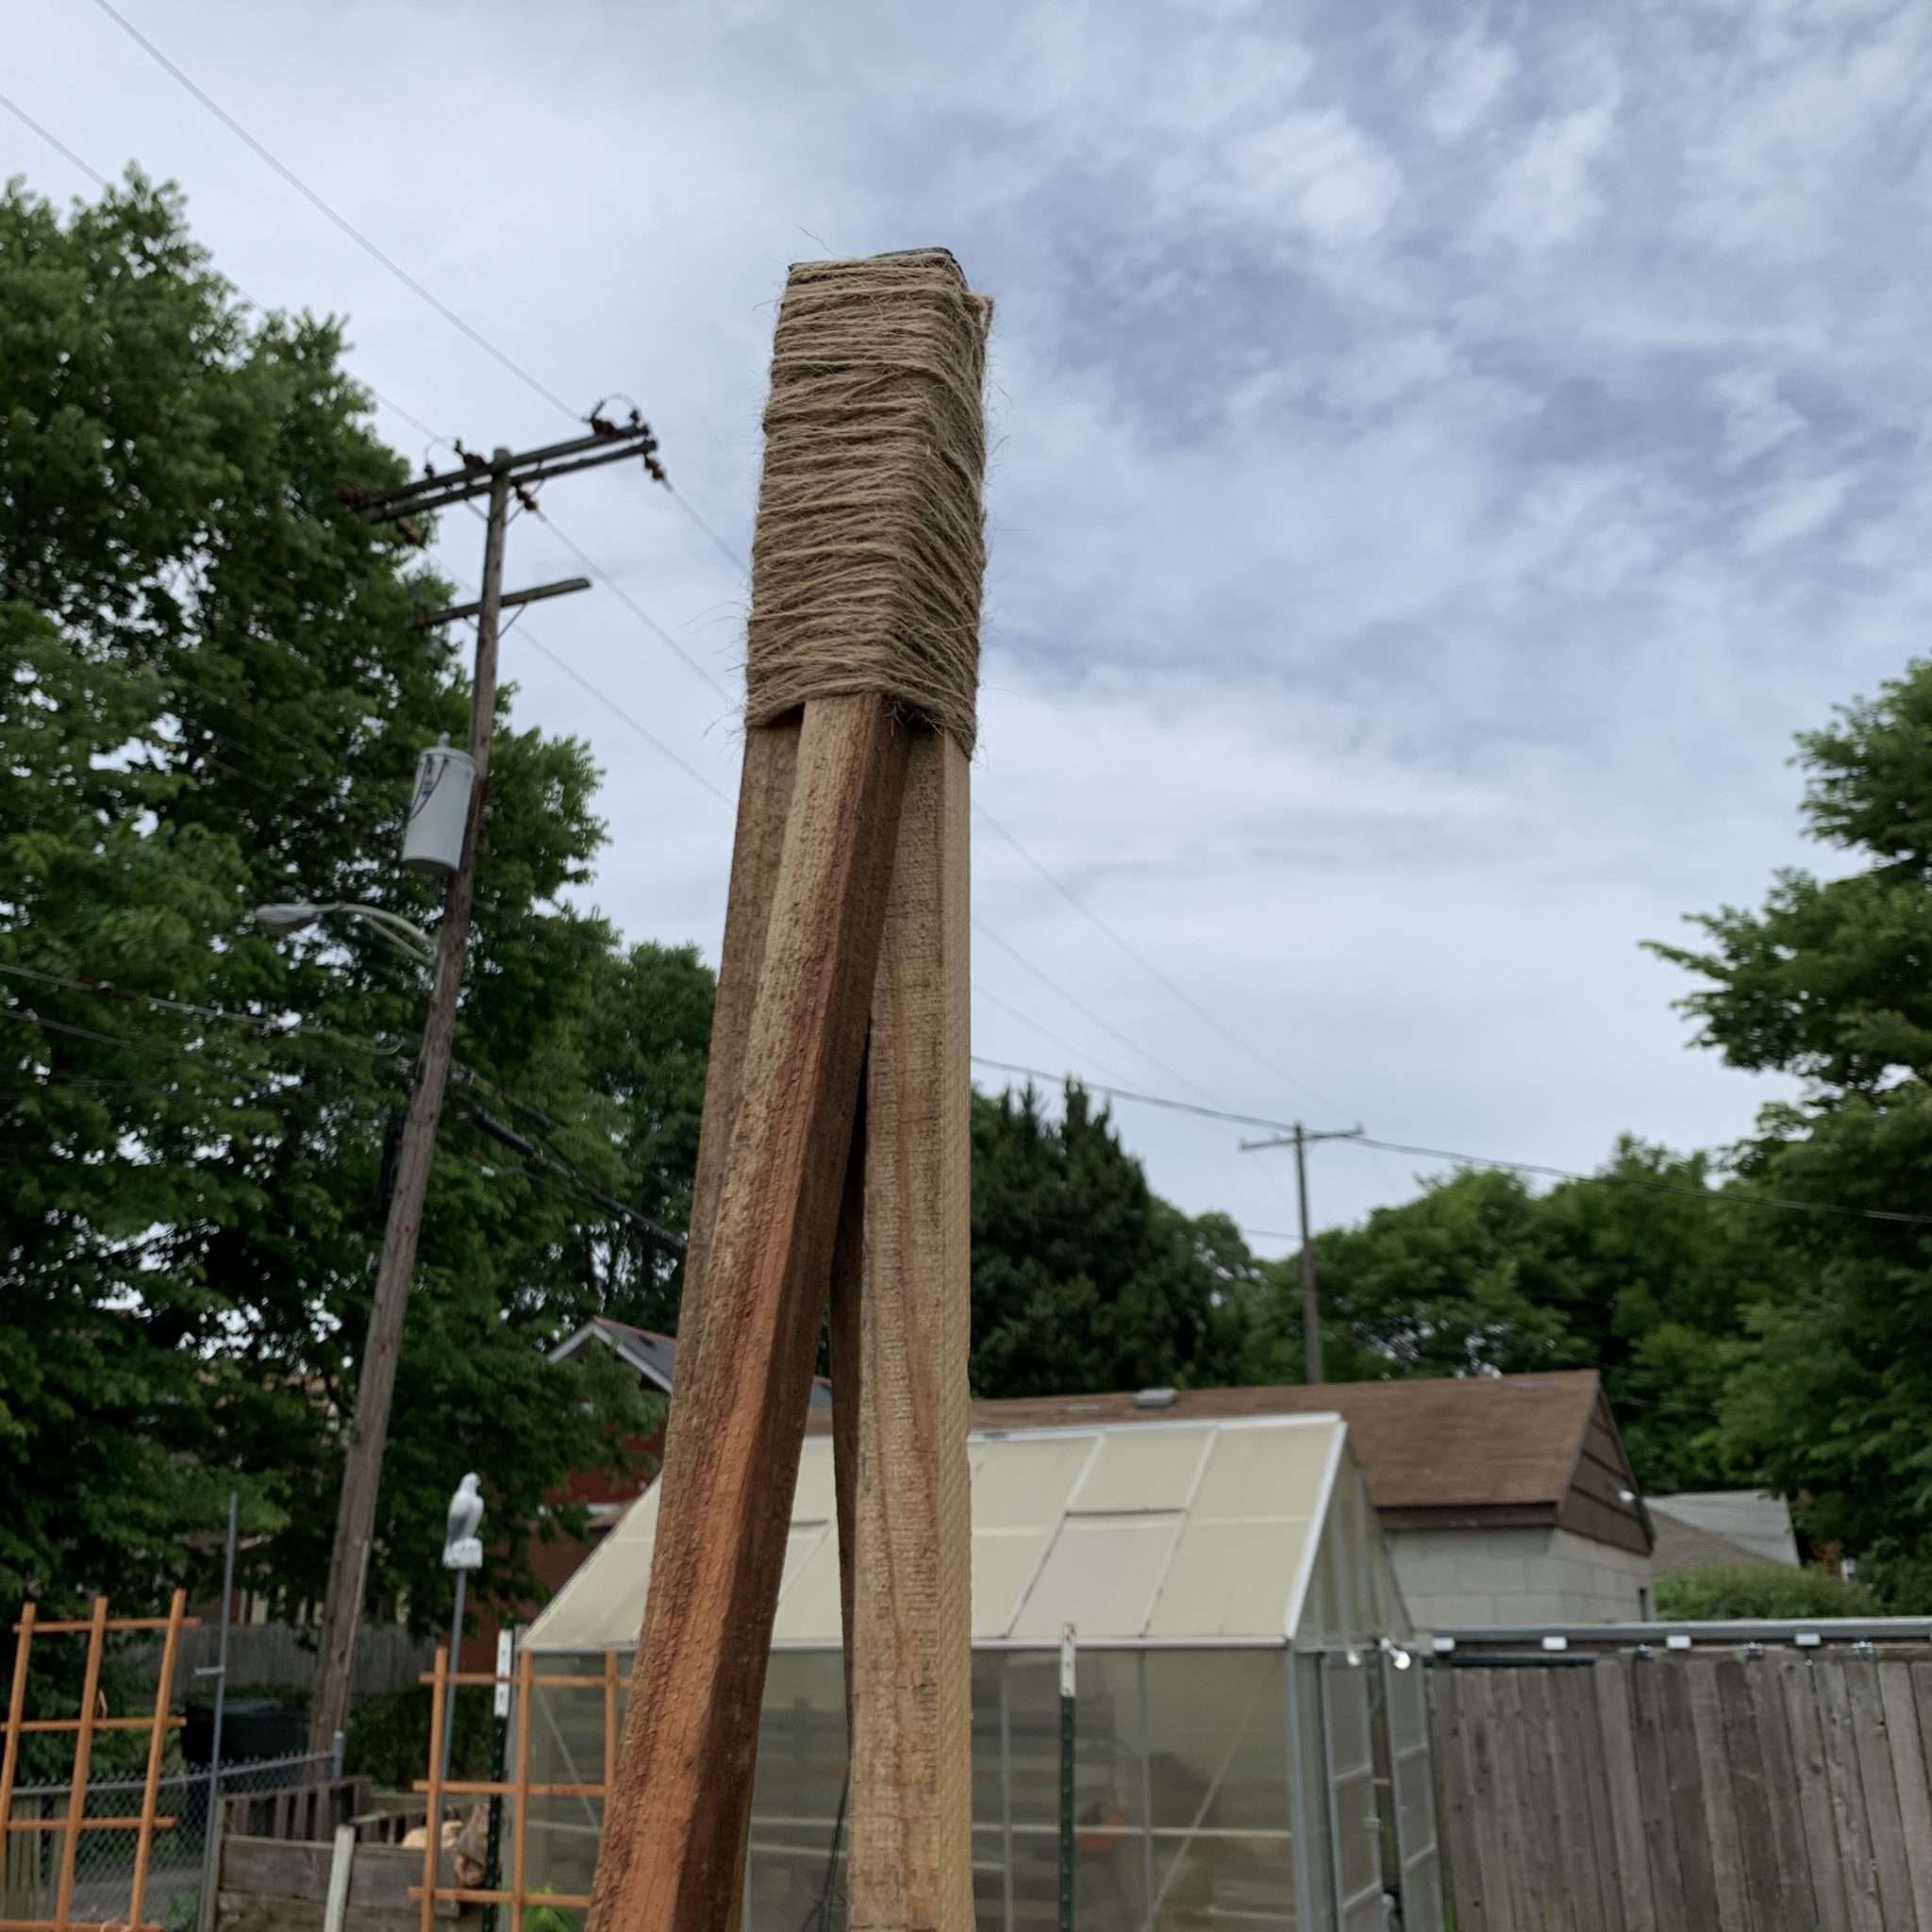
The other innovation is the use of duct tape to bind the poles. A strip around the left two, and a strip on the right two. Then a nice overlapping strip around the two halves. Have your twine ready to cover the duct tape.
Place the end of your twine under the last section of duct tape. This will tightly secure the twine. Then wrap that top with twine and voila! It looks very chic. BUT incredible durable. You will also find a great deal of cost savings here as the Duct Tape and hustle twine are very cheap.
Eiffel Tower Footings
Lastly the base is the most difficult part of this project. It’s a handful to stretch and hold this tower into the graceful “Eiffel Tower” shape that make this design so classic. Initially I tried just stabbing the stakes into the ground where I wanted them -- That did NOT work.
Invariably the stakes pull out. So short of having an extra hand to help (I almost always work alone - the plight of the urban farmer) I found a form that had the dimensions I wanted. I tied each stake end to a corner of that form.
This stabilizes the structure - which is now under dynamic tension. Then I attached the scrap wood braces/spanners. I used broken wine case wood to each face.
The cedar wine boxes were given to me by a sommelier friend. I love the way the scallops of the wine stabilizers look on this tower. I used thin metal screws to attach the stays to the stakes.
I may have to duct tape and twine wrap the corners yet. We’ll see. But any type of scrap wood will work. It will quickly be covered in vines!
Finally, when you have the tower shape set (It will be remarkably strong and stable once the braces are set) place it into position and force the stakes into the earth. I added two 24” pieces of rebar at opposite corners where I was going to plant.
Then I securely ties the two tower legs to that rebar to keep the towers stable in wind. The thin elegant shape looks great and the wind passes right through.
Let me know in the comments what you think of this project or what clever innovations you bring to this project! As always, reach out with questions or comments. Bon Chance!