Lesson: Solar Water Purifier

Lesson: Solar Water Purifier
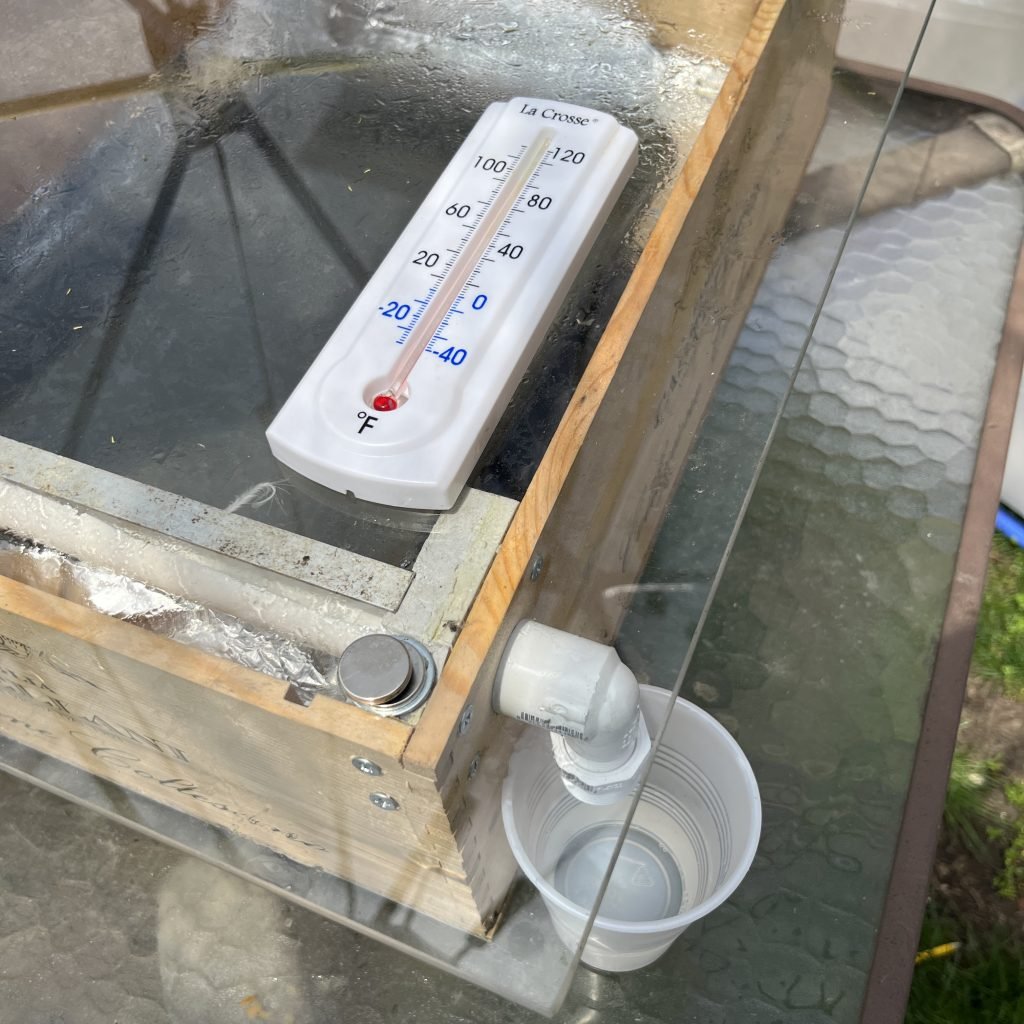
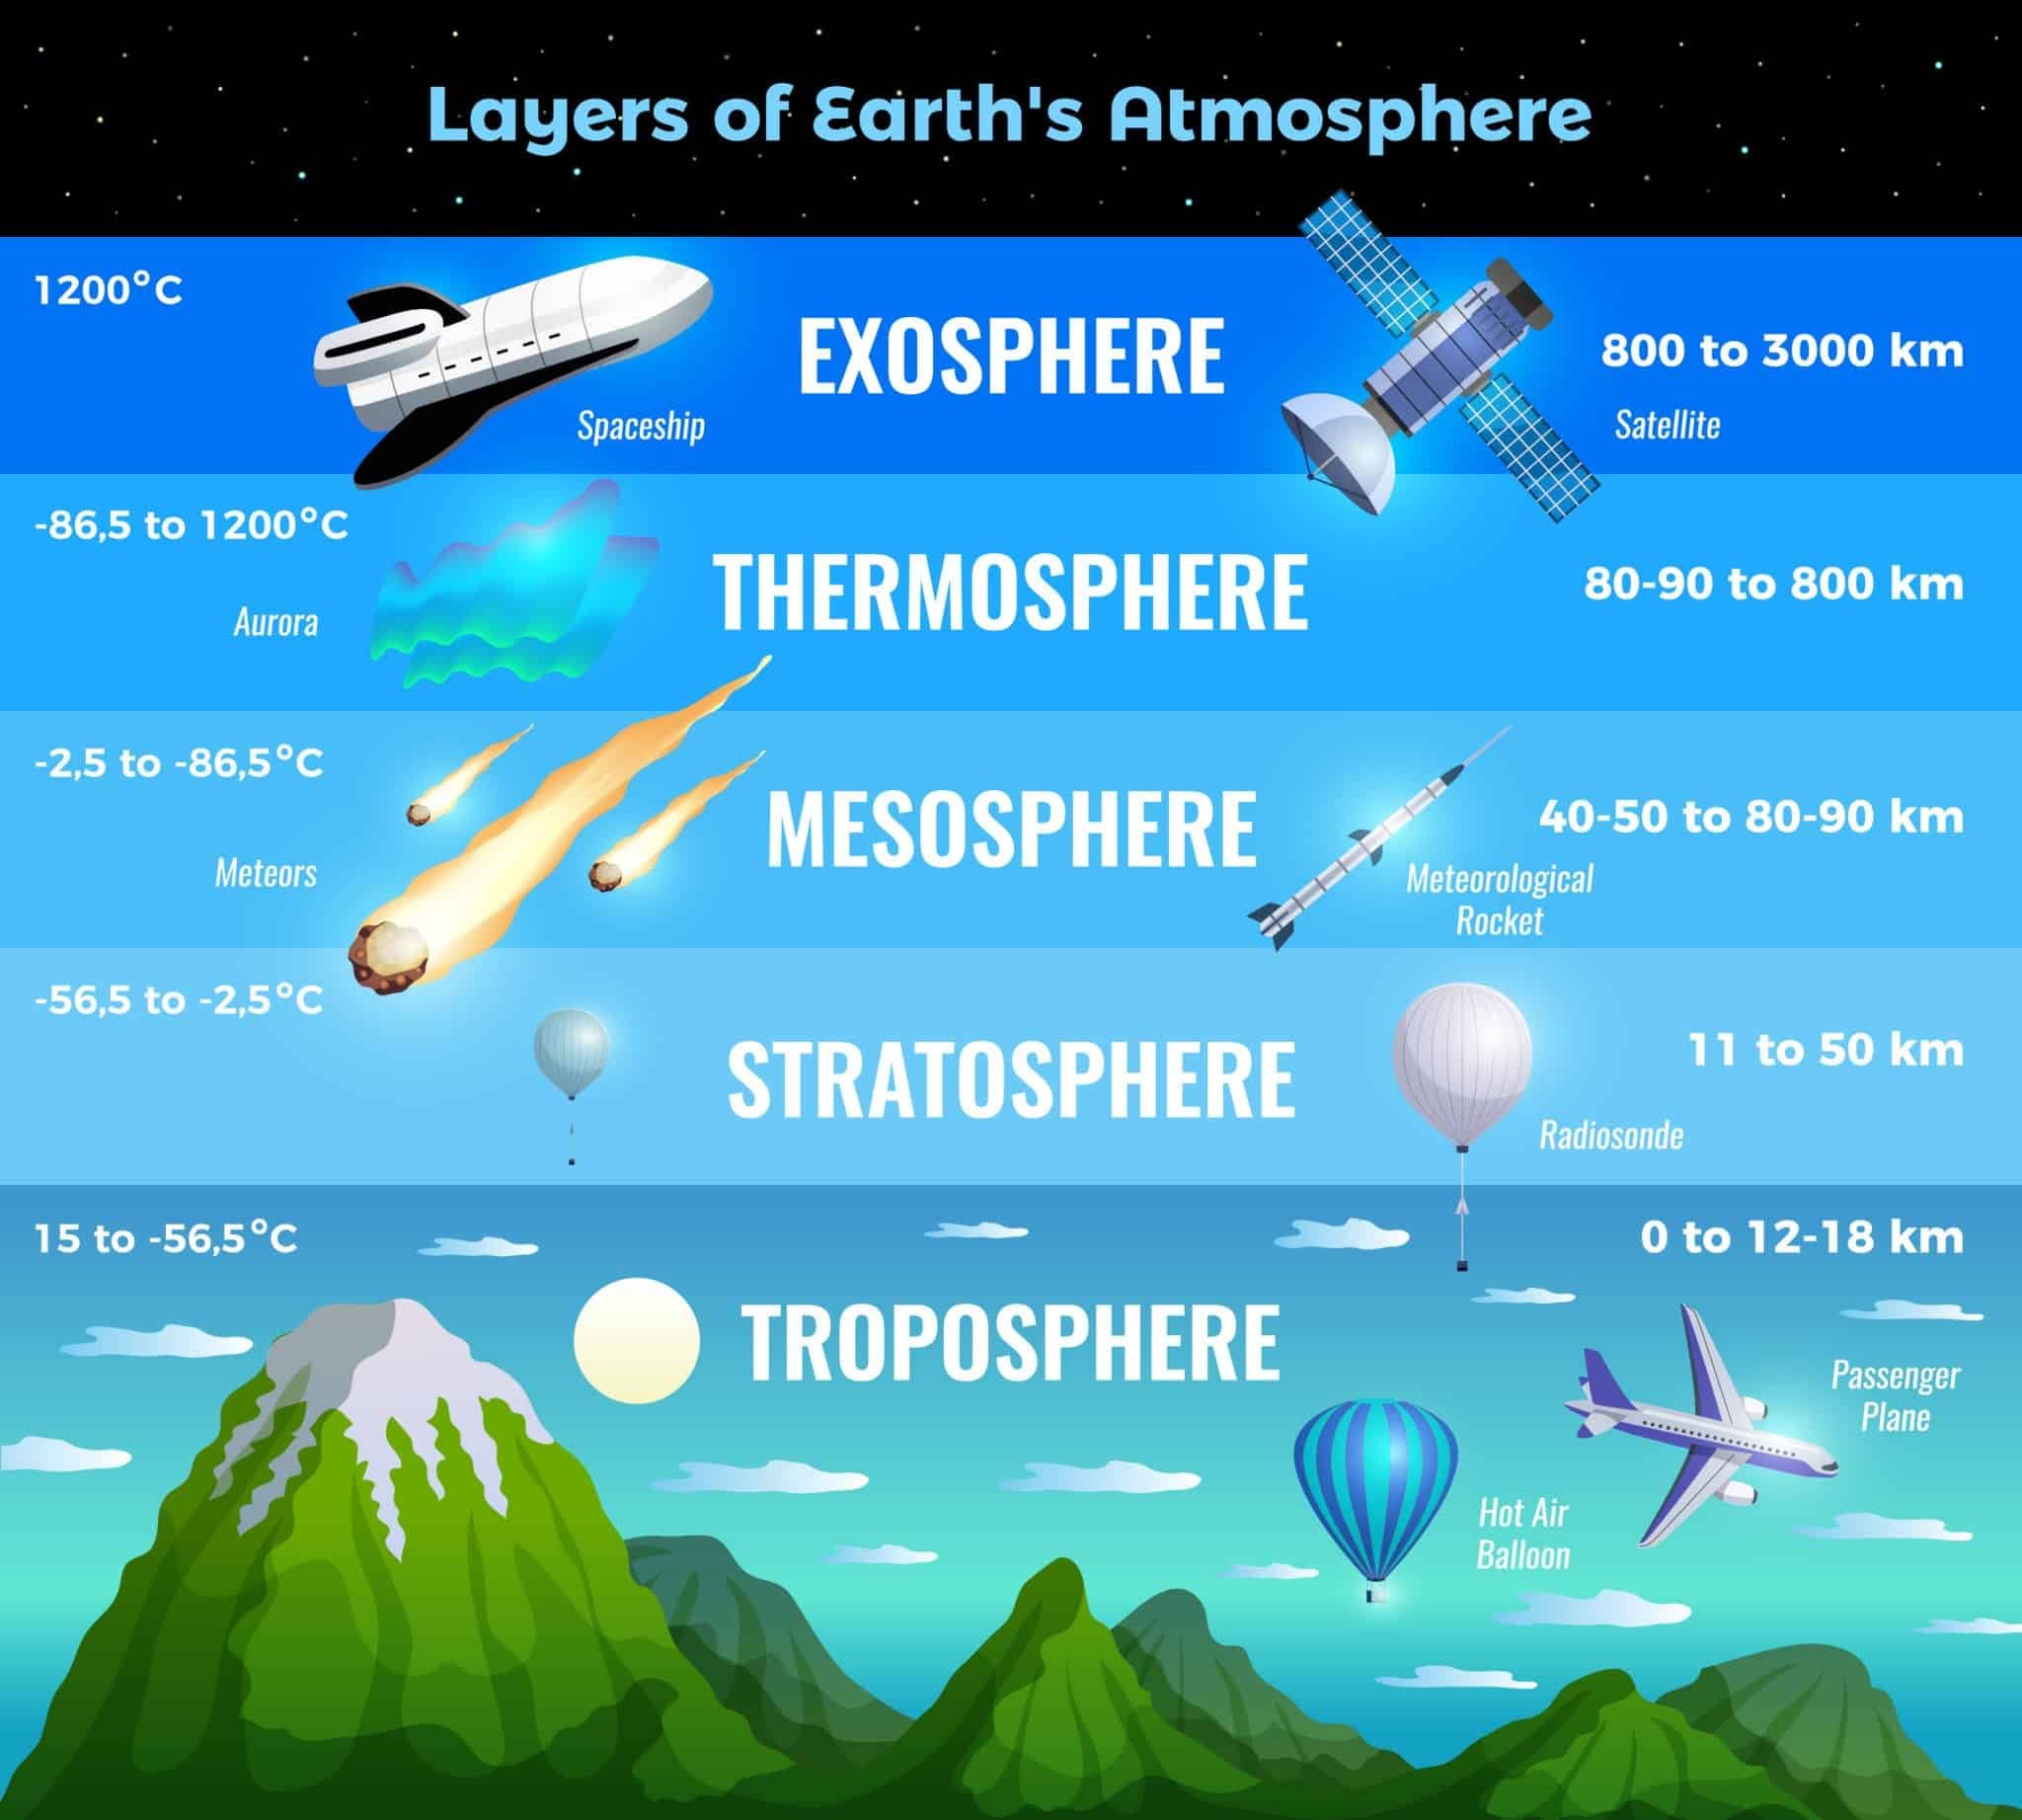
In this Lesson: Solar Water Purifier we will create a system that mimics the Earth's atmosphere and specifically the Troposphere to turn waste water into drinkable water. This sealed wooden box with a glass lid and a ceramic tray is angled so that when the evaporated water hits the glass, it rolls towards a drip edge and into a tray and then out into a sealed collection bottle.
Why Does This Work?
Remember water is a simple molecule with two covalently bonded hydrogen atoms and one oxygen atom. It is easy to transfer water from a solid, to a liquid, to a gas. All we need is pressure (AKA heat).
As the sun heats the interior of the box, the pressure increases and the water turns to vapor on the inside of the glass. Water is magnetic, so it wants to clump together. This makes raindrops on the inside of the glass that stick to the glass and roll down towards gravitational center of the planet.
Super Useful for Two Reasons
The water and pressure INSIDE the solar evaporator is higher than the outside pressure, so the water condenses quickly due to the glass surface being cooler. On our planet, it is actually the COLD vacuum of space that causes our atmosphere to cool and condense like this. So at night, the condenser is working until the interior cools down again.

This is exactly why we see morning dew and fog. The warm water is a vapor in the atmosphere and when touches the colder spider web or tree and plant leaves, it condenses back into water. This is called condensation and you can see it on your cold glass on a very hot day.
The other benefit to using a solar evaporator of solar condenser is that any impurities stay in the tray. Only PURE molecular H2O is transferred into vapor. This way the water we collect is very pure and drinkable.
Now, we still have some impurities (not a lot) but an even bigger issue is that this type of water is FILLED with ions. We need to add some minerals to it to make it drinkable. In nature our planet and atmosphere do that, but in this water we just need to add a bit of calcium and magnesium (salts).
Now Let's Build a Solar Evaporator!
Materials
- A wooden box (I use wine boxes)
- A piece of glass the size of the box
- some wood to serve as a glass edge frame
- Silicon caulk
- Wood Glue or small Screws
- Ceramic, glass or metal pan that will fit inside the wine box
- Piece of tin foil to make drip edge and line the box
- 1/2" PVC tubing
- 1/2" PVC tubing cut in half
- 1/2" PVC bulkhead assembly
- 1/2" PVC elbow
- 1/2" to 3/4" male screw end adaptor
- Small garden hose with a female end
- Screw adjustable legs for adjusting the hight of the high end of the box
- Jigsaw Power Tool
- Powered drill and 1/8" drill bit
- Screwdriver or drill screw attachment
- Electricity connection
Instructions
- First clean the wine box. Most small wine boxes are 11x14" so buy a frame that is also 11x14 and that takes care of fitting your glass properly.
- Use the wine separators to make your glass edge shim. I use wood glue to hold the wood shims to the outside of the box, but you can screw it on mechanically as well, your choice. Just make sure you seal any holes!
- Add the screw adjustors to the bottom of the wine box so you can create an angle of the box towards the water collection drip edge.
- Line the inside of the wine box with foil. You want photons to reflect around and increase pressure!
- Line the top edge of the wine box (inside the glass shims) with silicon caulk and let that set. This will be the seal for the evaporator.
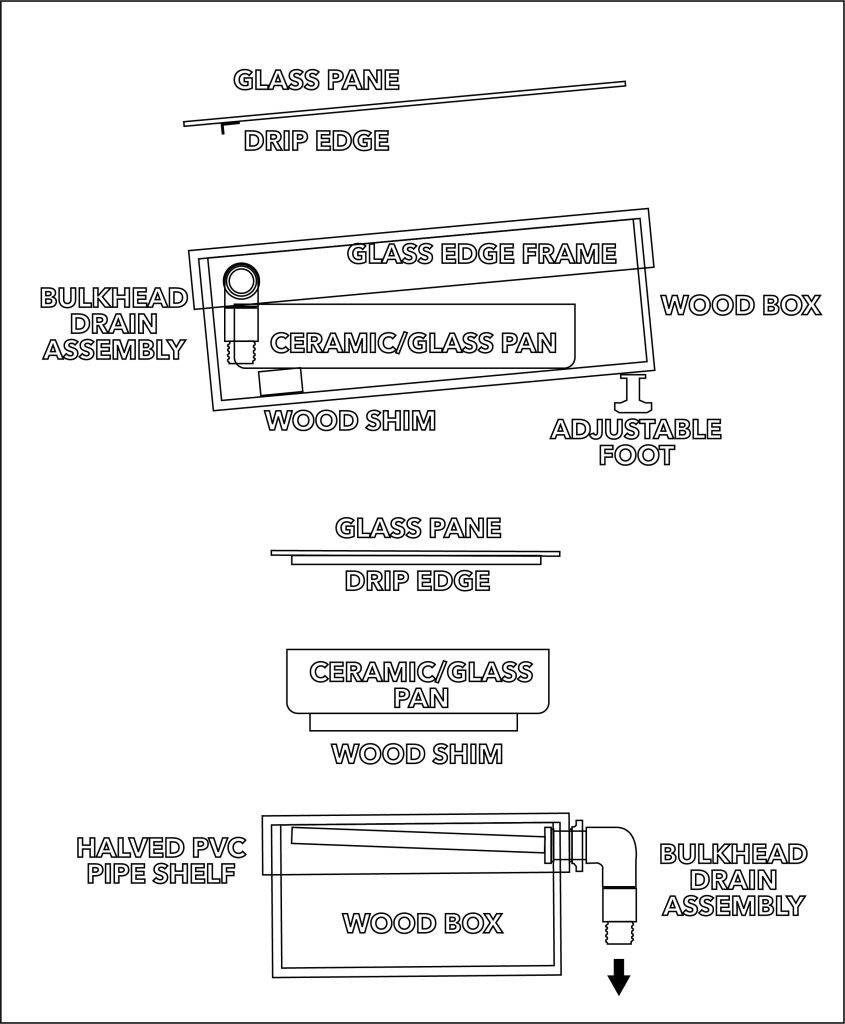
- Create an "L" shaped drip edge at the end of the evaporator glass that will be in line with the PVC water catchment and the bulkhead out of the box. This will direct water into your collection tray.
- install the bulkhead into the side of the wine box's lowest point. Follow instructions on the bulkhead assembly package.
- Fit the drip catch PVC into the inside face of the bulkhead (below the drip edge) and then add a 1/2" PVC connector to the elbow, one below the elbow into the male 1/2" to 3/4" screw connector and attach the hose.
- Place the pan for dirty water in the wine box and seal the glass on top. Use tape or string to keep the glass tight against the silicon caulk to provide just a bit more sealing.
- Place your solar evaporator with dirty water into the sun and wait!